
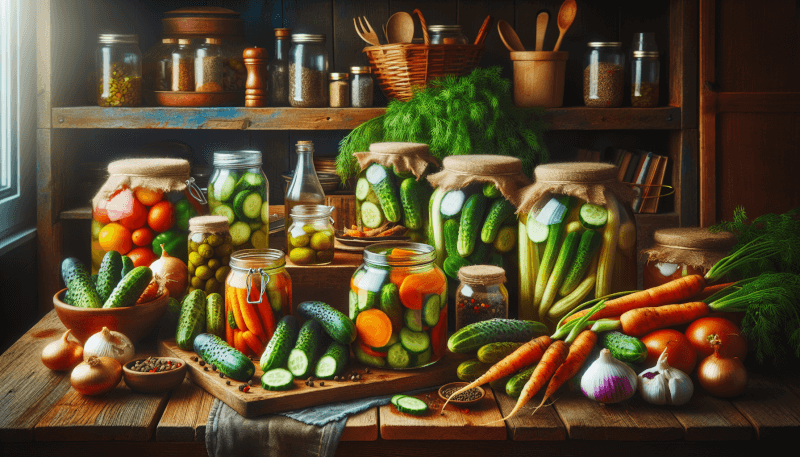
You’ve spent months tending to your garden, carefully planting and nurturing your crops. Now, as your garden harvest begins to overflow with an abundance of fresh cucumbers, you’re left wondering how to make the most of them before they go to waste. Look no further than this article, where you’ll find a simple and friendly guide on how to turn your garden’s bounty into delicious homemade pickles. With just a few basic ingredients and some patience, you’ll be able to enjoy the satisfying crunch and tangy flavor of your very own pickles, straight from your garden to your plate. Get ready to embark on a pickling journey that will elevate your culinary skills and impress your taste buds!

Choosing the Right Cucumbers
When it comes to making homemade pickles, choosing the right cucumbers is essential. Not all cucumbers are created equal, and selecting the wrong ones can result in less than desirable pickles. There are several types of cucumbers to choose from, each with their own unique qualities and flavors.
Types of Cucumbers
The first step in choosing the right cucumbers is understanding the different types available. There are two main categories of cucumbers: slicing cucumbers and pickling cucumbers.
Slicing cucumbers are larger and have a thicker skin. They are commonly used for salads and sandwiches but are not ideal for pickling. Their size and skin can make them too tough to pickle properly.
Pickling cucumbers, on the other hand, are specifically bred for pickling. They are smaller in size, usually around 4-6 inches, with a thinner skin. This makes them perfect for absorbing the flavors of the brine and becoming crisp and tangy pickles.
When choosing pickling cucumbers, look for ones that are firm and have a vibrant green color. Avoid cucumbers that have soft spots, wrinkles, or discoloration, as these may indicate age or spoilage.
Picking the Best Cucumbers
To ensure you have the best cucumbers for pickling, it’s important to pick them at the right time. Cucumbers should be harvested when they are still young and tender. As they mature, their taste can become bitter and their texture can become tougher.
When harvesting cucumbers from your garden, look for ones that are around 4-6 inches in length. Gently hold the cucumber in your hand and give it a slight twist. If it easily detaches from the vine, it is ready to be picked. Be careful not to apply too much pressure or force, as this can damage the plant.
Harvesting Cucumbers
When harvesting cucumbers, use sharp shears or a knife to cut the stem about 1/4 inch above the fruit. This will help prevent any damage to the cucumber or the plant. After harvesting, it is important to wash the cucumbers thoroughly to remove any dirt, debris, or pesticides from the surface.
Preparing the Cucumbers
Once you have harvested and washed your cucumbers, it’s time to prepare them for pickling. This involves a few simple steps to ensure they are clean and ready to absorb the flavors of the brine.
Washing the Cucumbers
After harvesting, gently scrub the cucumbers with a brush under cold running water. This will remove any dirt or residue that may be on the skin. Pay special attention to the ends of the cucumber, as dirt and bacteria can often accumulate there.
Trimming the Ends
Next, it is important to trim off the ends of the cucumbers. The blossom end, which is the end opposite the stem, contains enzymes that can lead to softening or spoilage of the pickles. By removing this end, you can help ensure the crispness and longevity of your homemade pickles.
Slicing Options
Depending on the style of pickles you are making, you’ll need to decide on the right slicing option. Slicing cucumbers into round discs, also known as coin-shaped slices, is a popular choice for many pickle recipes. This allows for easy eating and adds a visually appealing element to the jar.
However, if you prefer a different texture or appearance, there are other slicing options to consider. Some recipes call for spears, where the cucumbers are sliced lengthwise into long strips. Others may recommend slicing the cucumbers into chips or even julienne strips for a unique twist.
Ultimately, the choice of slicing options comes down to personal preference and the desired outcome of your homemade pickles.

Preparing the Brine
The brine is a crucial component of any pickle recipe. It not only adds flavor to the cucumbers but also helps preserve them by creating an acidic environment that inhibits the growth of harmful bacteria. Here’s how to prepare the perfect brine for your homemade pickles.
Brine Recipe
The basic brine recipe consists of vinegar, water, salt, and sugar. The proportions of these ingredients can vary depending on your taste preferences and the specific recipe you’re using. However, a common brine ratio is 1 part water to 1 part vinegar, with salt and sugar added to taste.
To prepare the brine, combine the vinegar and water in a pot and bring it to a boil. Add the desired amount of salt and sugar, stirring until dissolved. Taste the brine and adjust the seasonings if necessary.
Choosing Vinegar
When it comes to choosing vinegar for your brine, there are several options to consider. The most common types of vinegar used for pickling are white vinegar and apple cider vinegar.
White vinegar has a strong and sharp flavor, which can result in a tangier pickle. Apple cider vinegar, on the other hand, has a milder and slightly sweeter flavor, which can add complexity to the pickles. You can also experiment with other types of vinegar, such as rice vinegar or wine vinegar, to create unique flavor profiles.
Salt Options
In addition to vinegar, salt is a crucial ingredient in the brine. Not only does it add flavor, but it also helps preserve the pickles and maintain their crisp texture. There are different types of salt available, each with its own characteristics.
Table salt is the most common type of salt used in pickle recipes. It dissolves easily and provides a consistent flavor. Kosher salt, on the other hand, has larger crystals and is preferred by some pickle enthusiasts for its clean taste. If using kosher salt, be aware that it may require more volume to achieve the same level of saltiness as table salt.
Pickling salt, also known as canning salt, is another option to consider. It is free from additives and has a fine texture that dissolves easily in the brine. This can be particularly useful if you want to avoid any potential cloudiness in your pickles.
Adding Flavor Enhancers
Once you have the basic brine prepared, you can enhance the flavor of your pickles by adding various herbs, spices, and other flavorings. Here are a few popular options to consider:
Dill: Adding fresh dill to the brine can give your pickles a classic and refreshing taste. Both the dill seeds and the fronds can be used, depending on your preference.
Garlic: If you love the flavor of garlic, consider adding cloves or minced garlic to the brine. This can add a wonderful savory note to your pickles.
Spices: Spices such as black peppercorns, mustard seeds, coriander seeds, and red pepper flakes can add depth and complexity to the brine. Experiment with different spice combinations to create your own unique pickling blend.
Sweeteners: If you prefer sweeter pickles, adding sugar or honey to the brine can help achieve the desired flavor profile. Just remember to balance the sweetness with the other ingredients to avoid an overly sweet pickle.
Adding these flavor enhancers can elevate your homemade pickles and make them even more delicious. Don’t be afraid to get creative and tailor the flavors to your personal taste preferences.
Canning Process
Canning your homemade pickles is an excellent way to preserve them for long-term storage. This method involves sealing the pickles in sterilized jars and processing them in a water bath or pressure canner. Here’s a step-by-step guide on how to properly can your pickles.
Sterilizing Jars
Before you begin the canning process, it is crucial to sterilize your jars to eliminate any potential bacteria that could spoil your pickles. To sterilize the jars, wash them in hot, soapy water and rinse them thoroughly. Place the jars in a large pot and cover them with water. Bring the water to a boil and let the jars simmer for 10 minutes. Remove the jars from the water and let them air dry or dry them with a clean towel.
Packaging Pickles
Once the jars are sterilized, it’s time to pack your pickles into them. Carefully place the sliced cucumbers, along with any herbs or spices, into the jars, leaving about 1/2 inch of headspace at the top. This allows for proper expansion during the canning process.
Adding Brine
After packing the cucumbers into the jars, carefully pour the prepared brine into each jar, ensuring that the cucumbers are completely covered. Be sure to leave the appropriate headspace as indicated in the recipe.
Removing Air Bubbles
Before sealing the jars, it is important to remove any air bubbles trapped in the brine. This can be done by gently tapping the jars on a hard surface or running a non-metallic utensil, such as a chopstick, around the inside edges of the jar. This will help release any trapped air and ensure a tight seal.
Sealing Jars
To seal the jars, place the lids and rings on top of each jar, making sure they are centered. Screw the rings on tightly, but be careful not to overtighten, as this can prevent air from escaping during the canning process.
Processing the Pickles
The final step in the canning process is to process the pickles in a water bath or pressure canner. The method you choose will depend on the acidity of your brine and the recipe you’re using. Follow the specific instructions in your recipe to determine the correct processing method and time.
Water bath canning involves placing the sealed jars in a large pot filled with boiling water. The jars should be completely submerged and the water should cover them by at least 1 inch. Bring the water back to a boil and process the pickles for the recommended time. Once processed, carefully remove the jars from the water using jar lifters and let them cool completely before storing.
Pressure canning is necessary for pickles with low acidity or when using certain ingredients. Follow the instructions provided with your pressure canner to ensure safe and proper processing.
By following these canning steps, you can enjoy your homemade pickles throughout the year, even when cucumbers are out of season.

Fermentation Method
Another popular method for making homemade pickles is fermentation. This process involves allowing the cucumbers to sit in a brine solution for an extended period, allowing beneficial bacteria to naturally ferment the pickles. Here’s how to make fermented pickles at home.
Creating a Fermentation Brine
To create the fermentation brine, start with the same basic recipe as for canning pickles. Combine the vinegar, water, salt, and any desired flavor enhancers in a bowl, stirring until the salt is dissolved. The main difference with fermentation brine is that it does not need to be heated or boiled.
Packaging the Pickles
After washing and trimming the cucumbers, pack them into clean, sterilized jars. You can slice them into rounds, spears, or any other desired shape.
Adding Brine
Pour the fermentation brine into the jars, making sure the cucumbers are fully submerged. Leave about 1 inch of headspace at the top of the jar to allow for expansion during fermentation.
Fermentation Duration
Unlike the canning method, fermentation requires a longer processing time to allow for the desired flavors to develop. The duration of the fermentation process depends on personal preference and the desired level of tanginess. Fermentation can take anywhere from a few days to several weeks.
To check the progress, taste the pickles every few days. Once they reach the desired level of tanginess, you can move them to the refrigerator to slow down the fermentation process.
Storing Fermented Pickles
Once your fermented pickles have reached the desired flavor, transfer them to the refrigerator for storage. Fermented pickles will continue to develop flavor as they age, but the cold temperature of the refrigerator will slow down the fermentation process and preserve the pickles at their current state. Fermented pickles can be stored in the refrigerator for several months.
Fermenting pickles can be a fun and rewarding way to experiment with different flavor combinations and create unique pickles that are full of probiotics and health benefits.
Quick Pickling Method
If you’re looking for a faster pickle-making option, quick pickling is the way to go. This method allows you to enjoy homemade pickles in a matter of hours, without the need for long processing times or fermentation. Here’s how to make quick pickles at home.
Quick Pickling Brine
The quick pickling brine follows a similar recipe to the canning brine but can be adjusted to your taste preferences. Combine vinegar, water, salt, sugar, and any desired flavor enhancers in a pot, stirring until the salt and sugar are dissolved.
Due to the shorter processing time, the brine does not need to be heated or boiled. Simply combine the ingredients and move on to the next steps.
Packaging the Pickles
After washing and trimming the cucumbers, slice or prepare them according to your preference. Place the cucumbers in clean, sterilized jars or glass containers, leaving enough space for the brine to cover them completely.
Adding Brine
Pour the quick pickling brine over the cucumbers in the jars, making sure they are fully submerged. The pickles should be immersed in the brine for a minimum of 1-2 hours for maximum flavor absorption. However, for best results, refrigerate the pickles overnight before enjoying them.
Refrigeration Duration
After the pickles have absorbed the flavors of the brine, transfer the jars or containers to the refrigerator. This will help maintain the freshness and crispness of the pickles. Quick pickles can be stored in the refrigerator for up to 2 weeks, although they are often enjoyed within a few days due to their delicious flavor and texture.
Quick pickling is a convenient option when you’re in need of homemade pickles in a short amount of time. It allows you to enjoy the tangy goodness without the wait.

Adding Flavor Variations
One of the joys of making homemade pickles is the ability to experiment with different flavors and variations. By adding herbs, spices, and other ingredients, you can create a wide range of pickle flavors to suit your taste preferences. Here are a few popular flavor variations to try:
Dill Pickles
Dill pickles are a classic and beloved choice among pickle enthusiasts. The flavor combination of dill and garlic creates a pickle that is both tangy and refreshing. To make dill pickles, simply add fresh dill fronds and garlic cloves to the brine when preparing your pickles.
Garlic Pickles
For garlic lovers, garlic pickles are a must-try. These pickles are infused with the pungent and savory flavor of garlic, adding depth and complexity. You can achieve this flavor by adding extra garlic cloves or even using pickled garlic in the brine.
Spicy Pickles
If you prefer a little heat in your pickles, spicy pickle variations are the way to go. You can add red pepper flakes, jalapenos, or other hot peppers to the brine to achieve the desired level of spiciness. Experiment with different spice combinations to find the perfect balance of heat and flavor.
Sweet Pickles
For those with a sweet tooth, sweet pickles are a delightful option. By adding sugar or honey to the brine, you can achieve a pleasant balance of sweetness and tanginess. Adding spices such as cinnamon, allspice, or cloves can further enhance the sweetness of these pickles.
Bread and Butter Pickles
Bread and butter pickles are known for their sweet and tangy flavor, making them a popular choice for sandwiches and relish trays. To make bread and butter pickles, add sugar, vinegar, and a blend of spices such as mustard seeds, celery seeds, and turmeric to the brine.
These are just a few flavor variations to get you started. Feel free to get creative and mix and match different herbs, spices, and ingredients to create your own unique pickle flavors.
Troubleshooting Pickle Issues
While making homemade pickles can be a fun and rewarding experience, sometimes issues can arise that affect the quality of your pickles. Here are some common problems you may encounter and how to troubleshoot them.
Soft or Mushy Pickles
One of the most common issues with homemade pickles is that they turn out soft or mushy instead of crisp. This can be due to several factors, including using overripe cucumbers, inadequate brine strength, or insufficient processing time.
To prevent this, make sure to use fresh, young cucumbers that are firm and crisp. Also, ensure that the brine solution is properly balanced with vinegar, salt, and sugar to provide the necessary acidity and texture. Lastly, follow the recommended processing time in your recipe to ensure that the pickles have enough time to properly preserve and develop their texture.
Cloudy Brine
A cloudy brine can be a cosmetic issue that may affect the overall appearance of your pickles. This can be caused by mineral content in the water used for the brine or by using iodized salt, which contains anti-caking agents.
To avoid a cloudy brine, use distilled or filtered water for the brine solution. Additionally, opt for non-iodized pickling salt, which doesn’t contain any additives that can cause cloudiness.
Mold Growth
Mold growth on pickles can be a sign of spoilage and should be addressed immediately. This can occur if the brine solution is not acidic enough to inhibit the growth of harmful bacteria. It can also be caused by inadequate sterilization of the jars or by introducing contaminated utensils during the pickling process.
To prevent mold growth, ensure that your brine solution has adequate acidity. If necessary, adjust the amount of vinegar or add a small amount of lemon juice to increase acidity. Also, make sure to thoroughly sterilize your jars before packing the pickles. Avoid using dirty utensils or ones that have come into contact with other food items.
Salty or Bland Pickles
Achieving the perfect balance of saltiness in pickles can be a delicate process. If your pickles turn out too salty or bland, it can be disappointing.
To correct overly salty pickles, try soaking them in fresh, cold water for a short period of time. This will help draw out some of the excess salt. For bland pickles, consider adding a touch of salt or additional spices to the brine. Taste as you go to find the right balance of flavors.
Preventing Spoilage
To prevent spoilage and ensure that your pickles stay fresh and safe to eat, it is important to store them properly. Whether you’ve canned, fermented, or quick pickled your homemade pickles, follow these guidelines to keep them at their best:
Refrigerating Pickles: Once opened, refrigerate your pickles to slow down any potential spoilage. Keep them in a tightly sealed jar or container, making sure the pickles are fully submerged in the brine. Refrigerated pickles can last for several weeks or even months, depending on the recipe and storage conditions.
Canning for Long-Term Storage: If you’ve canned your pickles, store them in a cool, dark place away from direct sunlight. Make sure the lids are sealed properly and check for any signs of seal failure (such as a popped or bulging lid). Canned pickles can last for up to a year when stored correctly.
Proper Jar Storage: When storing your pickles, it is important to keep the jars upright to maintain a proper seal. Avoid moving or jostling the jars extensively, as this can disrupt the vacuum seal and increase the risk of spoilage.
Pickles Shelf Life: The shelf life of your homemade pickles can vary depending on the ingredients, sterilization process, and storage conditions. It is always best to check for any signs of spoilage, such as unusual odors, colors, or textures. If in doubt, it is safer to discard pickles that show any signs of spoilage.
By following these storage guidelines, you can enjoy your homemade pickles at their peak freshness and ensure they stay safe to eat.

Enjoying Homemade Pickles
After putting in the time and effort to make your own homemade pickles, it’s time to enjoy the fruits (or rather, vegetables) of your labor. Here are some suggestions for savoring and sharing your homemade pickles.
Pairing Suggestions
Pickles can complement a wide range of dishes and add a burst of flavor to your meals. Here are a few pairing suggestions to enhance your culinary experience:
Sandwiches: Pickles are a classic addition to sandwiches. Their tangy and crunchy texture can elevate the flavors of deli meats, cheese, and condiments. Try adding pickles to your next turkey or ham sandwich for an extra layer of deliciousness.
Cheese and Charcuterie Boards: Pickles are a natural fit for cheese and charcuterie boards. The acidity and crispness of the pickles provide a refreshing contrast to rich cheeses and cured meats. Pair them with a variety of cheeses, such as cheddar, gouda, or blue cheese, for a delightful flavor combination.
Burgers and Hot Dogs: Take your backyard barbecue to the next level by adding homemade pickles to your burgers and hot dogs. The tanginess of the pickles can cut through the rich flavors of grilled meats and add a vibrant touch to your meal.
Pickles in Recipes
If you want to incorporate your homemade pickles into your cooking, there are numerous recipes that showcase the versatility of pickles. Here are a few ideas to inspire your culinary adventures:
Pickle Relish: Turn your cucumbers into a delicious relish by finely chopping them and adding some mustard, vinegar, sugar, and spices. This relish can be used to top hot dogs, burgers, or grilled sausages.
Pickle Potato Salad: Add a tangy twist to your classic potato salad by incorporating chopped pickles into the mix. The pickles will add a burst of flavor and a pleasant crunch to the creamy salad.
Pickle Deviled Eggs: Elevate your deviled eggs by adding finely chopped pickles to the filling. The pickles will provide a refreshing zing and balance out the richness of the eggs.
Garnishing with Pickles
In addition to enjoying pickles as standalone snacks or recipe ingredients, they can also be used as garnishes to enhance the visual appeal of dishes. Here are some creative ways to use pickles as garnishes:
Martini Skewers: For an elegant touch, skewer a pickle slice, olive, and cherry tomato onto a toothpick and use it as a garnish for your martinis. This adds a pop of color and an extra layer of flavor to your cocktail.
Pickle Spear Swizzle Sticks: Jazz up your next Bloody Mary or cocktail by using a pickle spear as a swizzle stick. This not only adds a decorative element but also infuses your drink with pickle flavor as you stir.
Gift Ideas
Homemade pickles make thoughtful and delicious gifts for family and friends. Share your pickles by packaging them in decorative jars and adding a personalized label or tag. You can also include a list of suggested pairings or serving ideas to inspire the recipient’s culinary adventures.
Whether you’re enjoying your homemade pickles yourself or sharing them with others, the satisfaction that comes from tasting the fruits of your labor will make all the hard work worthwhile. So, savor every crunchy, tangy bite and remember that you’re enjoying pickles that you made with love from your own garden harvest.
Happy pickling!
